5 Ways to Measure Roof Pitch
 Cedar gable brackets add value and curb appeal to your home. Before you can purchase a decorative gable accent for your home you must know the pitch of your roof. If you don’t have your blueprints or a contractor handy, how do you find that information?
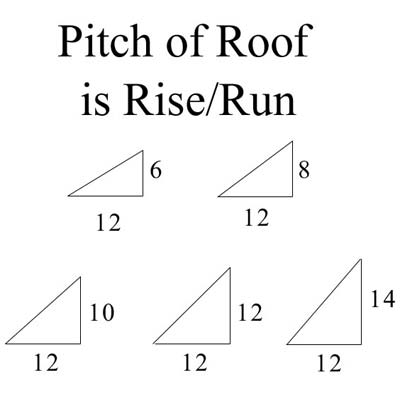
First what is a roof pitch? This is the term for how many inches in height your roof rises over one foot of run. So if your roof runs 12 inches over, then rises 8 inches up it has an 8/12 pitch. Run is always the measurement form left to right and rise is always the measurement going up and down. Notice this in the chart below and also notice how the run is always 12. This means roof pitch is usually calculated as x/12. For example 6/12, 7/12, 8/12, 9/12, 10/12, 11/12, 12/12, and so forth.
Now that you have a basic understanding of pitch, let's demonstrate several ways to calculate the pitch of your roof. Keep in mind that if your house is new construction, then the pitch may be listed on a set of blueprints, however, blueprints alone should be taken with caution. I have spoken to many customers in the past whose blue prints showed a 12/12 pitch on a custom home but the builder had to modify to an 11/12 or 10/12 pitch once the construction began. So always try to do a field measurement to get the most accurate result.
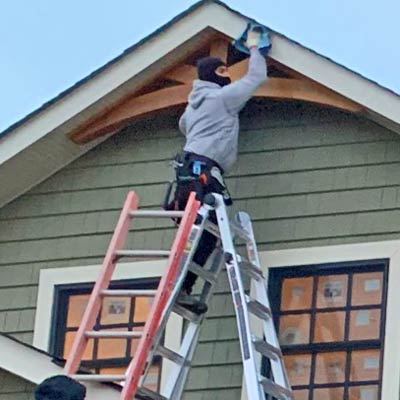
How to Measure the Pitch of a RoofMETHOD 1: Use a level and a tape measure. The first method of measuring the roof pitch is to either get on the roof or to use a ladder and climb to the edge of the roof where the gutter is. From here you can use a level to measure left to right, also known as the run, a distance of 12 inches. Hold the level steady so that the air bubble in the level is centered and this will tell you when the level is perfectly horizontal. Now, extend the tape measure out approximately 24" and lock it out so it is steady. Next place the end of the tape measure so that it touches the level at the 12" mark. Most larger levels have a built in tape measure on the side so you can utilize this. If you are near the edge of the roof then you will need to best position the level so that it is 12" horizontally from the edge and so that your tape measure is perfectly vertical at the end of the roofline. It is important that you form a 90 degree angle between the tape measure and the level to get the most precise measurement. If the tape measure touches the roofline and reads 10" then you will have a 10/12 pitch and if the tape measure touches the roofline at 9" you have a 9/12 pitch. Notice how easy it would be to get the pitch off by 1/12 if you do not hold the tape measure and level at exactly 90 degrees. Use a level and a tape measure. The first method of measuring the roof pitch is to either get on the roof or to use a ladder and climb to the edge of the roof where the gutter is. From here you can use a level to measure left to right, also known as the run, a distance of 12 inches. Hold the level steady so that the air bubble in the level is centered and this will tell you when the level is perfectly horizontal. Now, extend the tape measure out approximately 24" and lock it out so it is steady. Next place the end of the tape measure so that it touches the level at the 12" mark. Most larger levels have a built in tape measure on the side so you can utilize this. If you are near the edge of the roof then you will need to best position the level so that it is 12" horizontally from the edge and so that your tape measure is perfectly vertical at the end of the roofline. It is important that you form a 90 degree angle between the tape measure and the level to get the most precise measurement. If the tape measure touches the roofline and reads 10" then you will have a 10/12 pitch and if the tape measure touches the roofline at 9" you have a 9/12 pitch. Notice how easy it would be to get the pitch off by 1/12 if you do not hold the tape measure and level at exactly 90 degrees.
METHOD 2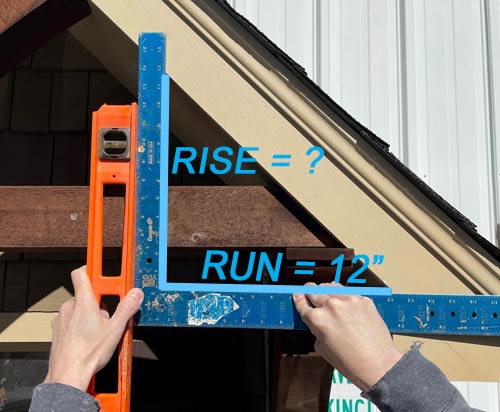 : Use a Builders Square and a Level. The second method of measuring the roof pitch is with a builders square and a level. The advantage to a builders square would be that it controls that the tape measure and the level are held at 90 degrees to one another for a more accurate measurement. This method also comes in hand when you can't get on the roof or you can only access the front roofline with a ladder. As always, practice ladder safety by having someone hold your ladder and placing it on level ground. Hire out a professional if you are not comfortable. To use this method you will place the builders square so that the tape measure on it shows a distance of 12 inches from the intersection of the roofline. Using the level along the vertical edge of the square, rotate slightly the builders square until the level shows the builders square point perfectly vertical. Realign the intersection of the square with the roofline at a distance of 12" inches if necessary to establish your 12" run. Once you have established your 12" run you can read the builders square to get the rise. The rise is where the builders square perfectly intersects the roofline. Pitch is then calculated as Rise/Run or x/12. Use caution when reading the builders square to use the inside measurements of the square as depicted by the blue lines in the diagram. : Use a Builders Square and a Level. The second method of measuring the roof pitch is with a builders square and a level. The advantage to a builders square would be that it controls that the tape measure and the level are held at 90 degrees to one another for a more accurate measurement. This method also comes in hand when you can't get on the roof or you can only access the front roofline with a ladder. As always, practice ladder safety by having someone hold your ladder and placing it on level ground. Hire out a professional if you are not comfortable. To use this method you will place the builders square so that the tape measure on it shows a distance of 12 inches from the intersection of the roofline. Using the level along the vertical edge of the square, rotate slightly the builders square until the level shows the builders square point perfectly vertical. Realign the intersection of the square with the roofline at a distance of 12" inches if necessary to establish your 12" run. Once you have established your 12" run you can read the builders square to get the rise. The rise is where the builders square perfectly intersects the roofline. Pitch is then calculated as Rise/Run or x/12. Use caution when reading the builders square to use the inside measurements of the square as depicted by the blue lines in the diagram.
METHOD 3: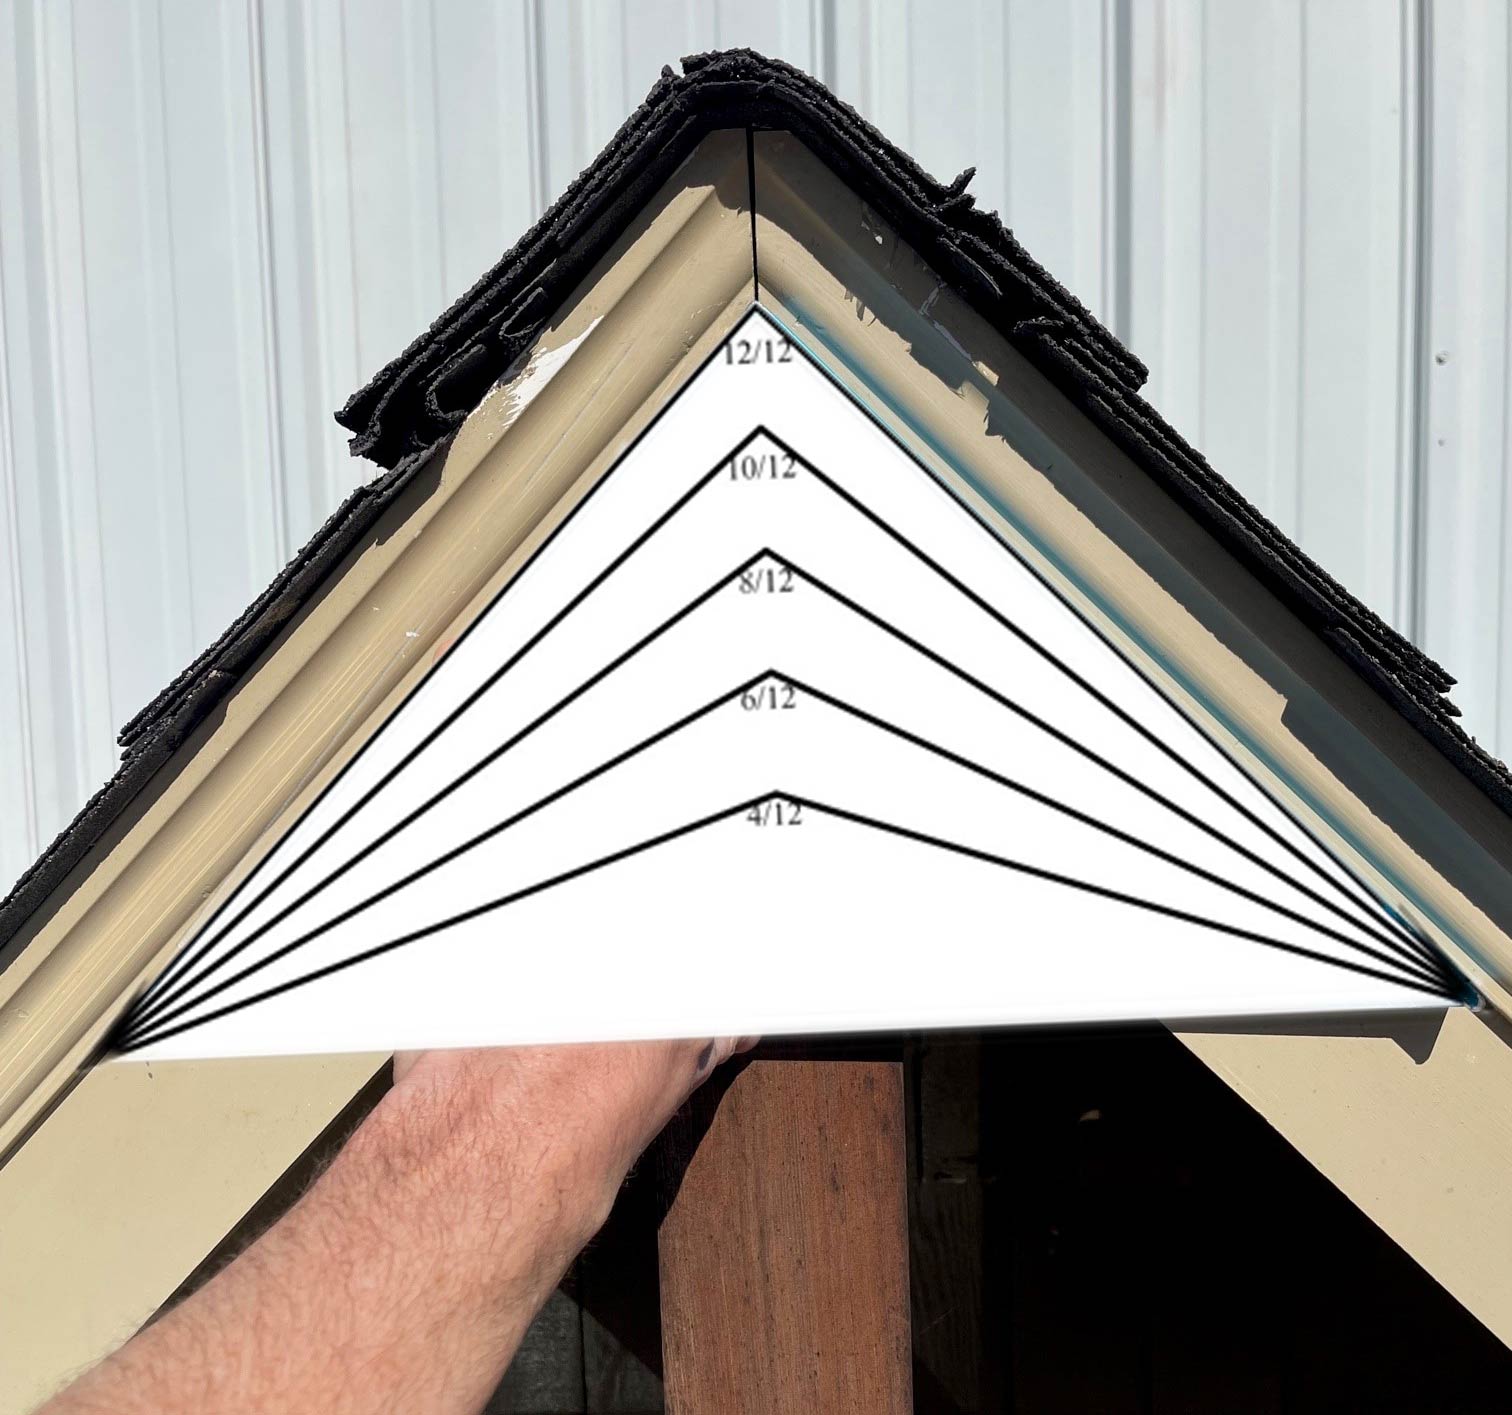 Use a printed pitch chart. The next technique you can use is more beginner and is more of an approximation. It can be used for a quick double check if you are also using one of the above methods. Download and print a pitch chart as a PDF that shows multiple pitches. Make sure the 12/12 pitch printed as a 90 degree angle which you can confirm by placing the corner of a piece of paper in the peak of the triangle to make sure its 90 degrees. If it is not a 90 degree angle, then your image has been stretched or printed out of scale and should not be used. Next, take the picture to the peak of the roof and fold it until your fold lines match the pitch of the roof. If your chart skips and only shows even numbers you may need a separate chart that shows odd numbers or a more robust chart that covers all the pitches. Pitches like 7/12 and 9/12 also are common and if your chart only shows 8/12 and 10/12 it could mean that you need a second or more robust pitch chart. If you cannot go outside and to the top of the roofline, you may be able to access the roofline from an attic or crawl space. In this attic you can place the pitch chart at the top peak of the trusses to get an approximation. Use a printed pitch chart. The next technique you can use is more beginner and is more of an approximation. It can be used for a quick double check if you are also using one of the above methods. Download and print a pitch chart as a PDF that shows multiple pitches. Make sure the 12/12 pitch printed as a 90 degree angle which you can confirm by placing the corner of a piece of paper in the peak of the triangle to make sure its 90 degrees. If it is not a 90 degree angle, then your image has been stretched or printed out of scale and should not be used. Next, take the picture to the peak of the roof and fold it until your fold lines match the pitch of the roof. If your chart skips and only shows even numbers you may need a separate chart that shows odd numbers or a more robust chart that covers all the pitches. Pitches like 7/12 and 9/12 also are common and if your chart only shows 8/12 and 10/12 it could mean that you need a second or more robust pitch chart. If you cannot go outside and to the top of the roofline, you may be able to access the roofline from an attic or crawl space. In this attic you can place the pitch chart at the top peak of the trusses to get an approximation.
METHOD 4: Measure In the attic. This is generally safer than an exterior measurement. You can actually use any of the techniques above from the attic with slight variations. You will need a level, a tape measure or a builders square, a pencil, and some clamps. Place the level against the base of the roof rafter and then slide it over until it is in contact with the underside of the roof.
Now adjust the level until the bubble is centered. Clamp the level to the rafter.
Use your measuring tape and mark 12” from the end of your level. Remember pitch is expressed as Rise/Run. The 12" from the edge of the roof sheeting is your run.
Now use your tape measure to measure the distance down from the roof deck directly above the 12-inch mark on your level. Make sure the tape measure is at a true right angle to the level. For example, if the tape measure is 7" from the roof deck, then the pitch is 7/12.
METHOD 5: Use an Apple or Android App. Apps are available for both Apple and Android
Search for apps on the Google play store or in the Apple Store. There are several versions available. This is a great safe way to estimate your roof pitch but should be used as an estimate only. Then, have a professional physically measure as described in one of the three locations in the first method is recommended before you order a gable.
The apps work in different ways. Often you simply lay the phone on the roofline and the phones internal gyros help understand it's orientation and angle to help estimate the pitch of the roof.
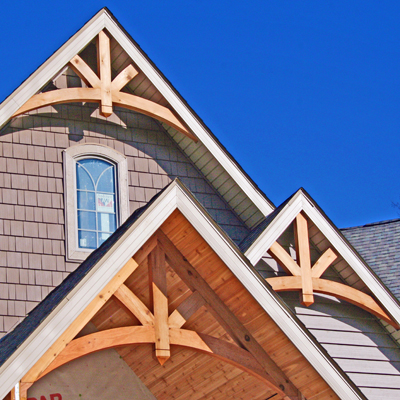 Flower Window Boxes, is one of the largest producers of decorative cedar gables. We custom make them out of cedar in various designs, pitches, and lengths. The above article will hopefully help you to measure your roof pitch prior to purchase. Click the photo to the left for more information and to purchase. Flower Window Boxes, is one of the largest producers of decorative cedar gables. We custom make them out of cedar in various designs, pitches, and lengths. The above article will hopefully help you to measure your roof pitch prior to purchase. Click the photo to the left for more information and to purchase.
 About the Author About the Author
Matthew Buquoi is the owner of Flower Window Boxes, Inc., which is one of the largest online window box companies in the United States. In addition to being the owner, he is also an expert author, and regularly writes about industry topics in the window boxes, planters, exterior shutters, and home and garden industry.
|
|
|