How To Build a Large
Wooden Planter
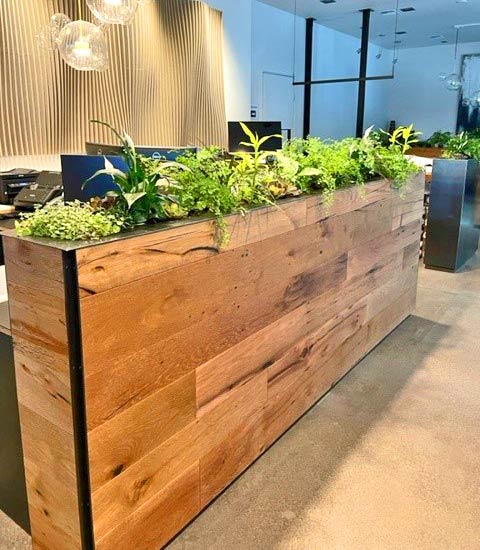
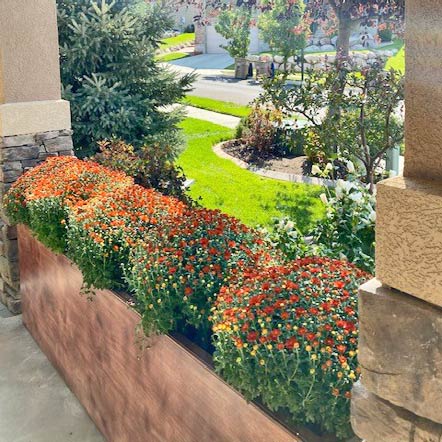 You are looking to build a large wooden planter and you have basic tools and good general knowledge but have never tried to plan
and build from scratch. You might first think of plywood but even sealed or
treated it is going to break down and delaminate as soon as it spends any time
in contact with dirt and water. So, you think of larger slabs of solid wood,
maybe cedar, cypress, or redwood: those are beautiful and can be weather resistant,
but they are going to be very expensive and require more tooling and experience
to get useful sections out of. This leaves you needing to build from tongue and
groove boarding. You can find the boarding readymade or use a router bit kit to
turn standard 1x4 boards into tongue and groove. Cedar is likely going to be
your best option for your wood choice given its wide availability and weather
resistance; even with that you are going to spend a significant amount of time
in maintenance to keep this box healthy and looking good for more than a year. Here
is a plan to build a tongue and groove wooden planter that measures 42” L x 18”
H x 18” W
You are looking to build a large wooden planter and you have basic tools and good general knowledge but have never tried to plan
and build from scratch. You might first think of plywood but even sealed or
treated it is going to break down and delaminate as soon as it spends any time
in contact with dirt and water. So, you think of larger slabs of solid wood,
maybe cedar, cypress, or redwood: those are beautiful and can be weather resistant,
but they are going to be very expensive and require more tooling and experience
to get useful sections out of. This leaves you needing to build from tongue and
groove boarding. You can find the boarding readymade or use a router bit kit to
turn standard 1x4 boards into tongue and groove. Cedar is likely going to be
your best option for your wood choice given its wide availability and weather
resistance; even with that you are going to spend a significant amount of time
in maintenance to keep this box healthy and looking good for more than a year. Here
is a plan to build a tongue and groove wooden planter that measures 42” L x 18”
H x 18” W
Material Needed to Build Wood Planter
7) 96” Cedar 1x4- Exterior wood glue-
76) #6x2” Outdoor rated trim
head screws
Caulk- Wood filler
Oil based Stain + Sealant or Paint
Sandpaper 100 & 220 grit
Tools Needed to Build Wood Planter
Miter saw
Circular saw
Table saw
Drill
Driver bit to match screws
⅛” wood drill bit with counter sink
¼” wood drill bit
Clamps
Tape measure and pencil
Speed or framing square
Router with tongue and groove bit set
Planter Cut List
(4) 1” x 3” x 18”
(4) 1” x 2.25” x 18”
(4) 1” x 3” x 41”
(4) 1” x 3” x 15”
(38) 1” x 3” x 11.5”
(tongue and groove)
(12) 1” x 3” x 15.5”
(tongue and groove)
Step 1: Break down all the wood, first cut the 1x4 to length then width according to the cut list below; remember to account for the tongue and groove route so that you will have a 3” facing on the final boards. Finally run the boards through the router to create the tongue and groove.
Step 2: Time to create the panels for the sides and bottom.
For the long face you will take 14 of the 11.5” tongue and groove boards
fitting them together with glue in the seams and held tight with clamps until
dry, for the short side you will glue and clamp 5 of the 11.5” boards, the
bottom panel is made of 13 of the 15.5” boards. When you put these panels together
and clamp them you may have some glue squeeze out wipe this off now and it will
make clean up later easier. Your glue will tell you how long to allow it to
“cure” before it is usable, but this is typically a couple hours to overnight
for best strength. Remember you need to create 2 long sides and 2 short sides. Be
sure the boards are tight together you do want them as straight and square as
possible but if there is a little unevenness on the height of the boards this
is okay as they were cut ½” longer than needed so they can be trimmed straight
and square after they are dry and set.
Step 3: Once these panels are dry take them out of the
clamps and use the framing square and circular saw to trim the tops and bottoms
of the panels straight and square, the long faces should have a final face
dimension of 40.5”x11” not counting the route, the short sides should be 15”x11”
not counting the route, and the bottom panel should be 39”x15” this will not be routed. Once the
panels are all trimmed run the faces long and short through the router to
create the tongue on top and the groove on the bottom to fit into the top and
bottom railings.
Step 4: It is time to attach the top and bottom rails these
will be the 1”x3”x41” for the long sides, and the 1”x3”x15” for the short
sides, run them through the router to create the tongue on 2 each of the short
and long pieces these will be the bottom rails, and the groove on the other 2
pieces these will be the top rails. Fit the panels inside the railings with
glue and secure with clamps then allow to dry fully.
Step 5: Once all the final panels are dry take them out of
the clamps for assembly. We will start with your two long faces, your two short
sides, and the bottom. You will use glue and 2” screws to attach the bottom to
the short sides first, then attach the two long faces also with glue and screws.
You will use the 1/8” drill bit with the counter sink to create pilot holes to
avoid splitting the boards. Make sure the counter sink bit creates a ¼” deep
void for the head of the screw so it can be fully recessed with room for wood
filler to hide the head.
Step 6: You will want to sand the whole box now first with
the 100 grit then with 220 grit to smooth out seams and clean up any leftover
glue squeeze out and excess wood filler.
Step 7: You need to attach the legs to create an air gap under
the box so that the box can properly drain excess water. To do this you will
use the 4-1x3x18 and the 4-1x2.25x18. Take the box and flip it upside down on a
flat level surface, use glue and screws to attach the 2.25” to the short side first
making sure they are flush to the long edge, then add the 3” wide legs on the
long sides flush to the outside edge of the other side.
Step 8: The planter is built now you need to make it usable;
you will want to drill a series of drain holes in the bottom a 3x4 grid of
roughly equally spaced ¼” drain holes in the bottom be sure to steer clear of
the screws to avoid damaging the drill bit and exposing the screw to moisture
which can lead to rust. To seal the box and increase its longevity you will
want to caulk the interior seams to keep it from leaking there and cover the
whole box inside and out in waterproof sealant. This can be a clear coat like a
plain polyurethane of a stain plus sealant or even paint; your choice of
sealant may affect your plants so be careful what you use if you want to grow
food plants. You want to make sure the result is waterproof, but they can all
break down over time so this sealant will need to be reapplied on a regular
basis. With the box in constant contact with dirt and water you will need to
maintain the box each year by cleaning it out and checking for rot and spots
that need to be touched up.
If this all sounds like you have set your sights on a
project above what you were hoping for, our company can help with this as we specialize in making
custom planter boxes, PVC planters, and cedar window boxes. Our flower boxes come fully assembled built in the USA with American sourced materials by
professional carpenters. They also are low maintenance and have a lifetime
guarantee.
Give us a call at 888-505-7715 to speak to one of our sales reps,
we are open from 7a-4p EST Monday-Friday.
 About the Author About the Author
Matthew Buquoi is the owner of Flower Window Boxes, Inc., which is one of the largest online window box companies in the United States. In addition to being the owner, he is also an expert author, and regularly writes about industry topics in the window boxes, planters, exterior shutters, and home and garden industry.
|
|
|