DIY Window Boxes
If
you’d like to add greenery and color to your home’s exterior, try
DIY window
boxes
. It's a great project for anyone and here we discuss the entire process from measuring to planting. Adding planters bring charm, character, and curb appeal, making your living space more
attractive to visitors. Additionally, they set expectations and create value
for potential buyers.
On the
other hand, these boxes can come in handy if you’re just looking for extra
gardening space. You can plant a wide variety of flowers, herbs, and vegetables
on your window sill to create a sustainable future for your family and improve
your home’s air quality.
That’s
not all.
There
are also self-watering window boxes that allow you to enjoy the benefits
of a mini garden without the hassle of constantly watering plants. This is
especially useful when you’re far from home and can’t find anyone to tend to
your flowers.
In this
article, we’ll discuss how to measure, make, and plant window boxes. Let’s
dive right in.
DIY - Window Box Measuring
The
first thing you should do is measure your windows
accurately to ensure the window boxes will fit perfectly and function as intended. If the flower box is too small, your plants will be too cramped to survive.
Similarly, if the box is too large, it may not fit properly onto the windowsill
and thus look out of place.
How to Measure the Window's Width and Depth
Materials
Measuring tape
Pen/pencil
Notepad
Steps
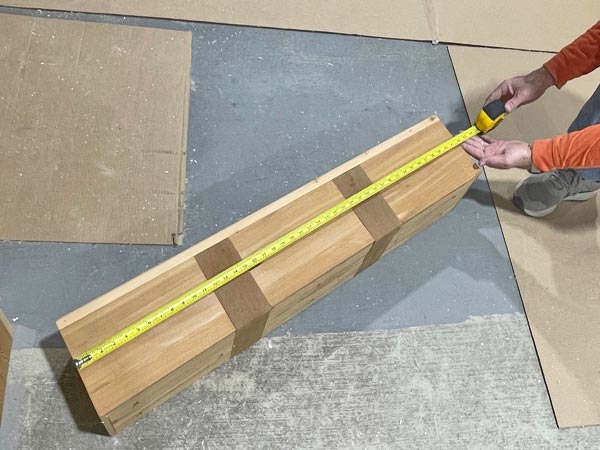
To measure the
width of your window, extend the tape measure from the inside edge of one
side to the other and record your reading.
or include the trim that wraps around the window as well if you are on siding to give a more custom fitted look
Note: If
your window is difficult to reach, use a ladder or ask a friend to assist
you.
How to Determine the Appropriate Size for Window Boxes
Using
the measurements from the window, you can calculate the right size for your window planters.
 As a
general rule of thumb, we recommend to make a window box that matches at least the size of the windows length and a minimum of 7" inches deep so that you have enough room for planting. This will ensure your box fits perfectly
and looks proportionate to your window. A height of more than 8" is recommended for a two story home to keep the box from looking too small for the window. Finding board this tall can sometimes be challenging.
As a
general rule of thumb, we recommend to make a window box that matches at least the size of the windows length and a minimum of 7" inches deep so that you have enough room for planting. This will ensure your box fits perfectly
and looks proportionate to your window. A height of more than 8" is recommended for a two story home to keep the box from looking too small for the window. Finding board this tall can sometimes be challenging.
Making Window Boxes
Building
flower window boxes is an amateur-friendly project.
While
it requires basic carpentry skills like cutting and joining lumber pieces using
screws or nails, it can be an easy project if you have clear instructions and
tools.
You
also need the patience needed to create beautiful and functional DIY window boxes
that improve your home’s “wow factor.”
Materials
Lumber for the
box
Screws/nails
Drill/hammer
A saw
Outdoor
paint/sealant
Potting soil
and plants/flowers
Steps
Using the
window measurements, cut the lumber into the right-sized pieces.
Assemble the
box by joining its sides, bottom, and ends using screws/nails and a
drill/hammer.
Drill drainage
holes at the bottom of the box to allow excess water to escape.
Paint or seal
the wood using the sealant to protect it from harsh elements of the
environment.
Attach the box
to your window using screws/brackets.
Fill the box
with potting soil and your favorite plants/flowers.
Alternative Materials and Methods for Making Window Boxes
You can
purchase
metal window boxes or make yours from sheet metal and
paint them to match your house’s exterior.
Repurposed
items
like old crates or drawers are suitable for creating unique flower window
boxes. Cedar wood is especially great due to it's natural resistance to bugs. Some manufacturers make
cedar window boxes reinforced with composite materials for lower maintenance. PVC window boxes are a good alternative if you want to order low maintenance boxes from a manufacturer that can be painted to
match your home’s exterior.
For a deck or porch project instead of a window you can use
flower boxes that hang on rails by hanging them from rail hooks for rail planters. If you don’t
want to damage your building’s exterior, use
heavy duty
flower box liners or planters on
your window sills or ledges without attaching them to the walls.
Tips for Customizing Window Boxes to Match the Aesthetic of Your
Home
Here
are 5 tips for customizing DIY window boxes to match the aesthetic of your
house:
Your House Style Matters
If your
home has a classic or rustic look, consider using wooden window boxes with a
natural finish.
Alternatively,
if your house has a modern or contemporary style, metal or plastic window boxes
with clean lines will do just fine.
Research Your Plants
Flowers
like petunias and geraniums complement homes with a traditional style. The deep
velvet hues of petunias make the clean white flowers of geraniums pop
out.
On the
other hand, succulents, cacti, and other low-maintenance plants stand out in
modern or contemporary homes.
Use the Right Hardware
Use
brass accents and wrought iron hardware
to add a timeless and elegant touch
to old homes. These materials create a warm and classic experience that
improves the look of traditional houses.
Alternatively,
use stainless steel and aluminum hardware for contemporary spaces because they
have a sleek appearance that complements a modern design.
Check Your Paintwork
Ensure
your colors blend seamlessly with the building’s exterior. This
creates an appealing, cohesive look that ties the house’s exterior
together.
Regular Maintenance
Let
your flower boxes remain in optimal condition by watering the plants.
You should also repaint or stain wooden window boxes approximately every 2-3 years to prevent them from
deteriorating. Sealant helps keep the bugs out and a fresh coat keeps the boxes looking brand new and extends the life of the box significantly.
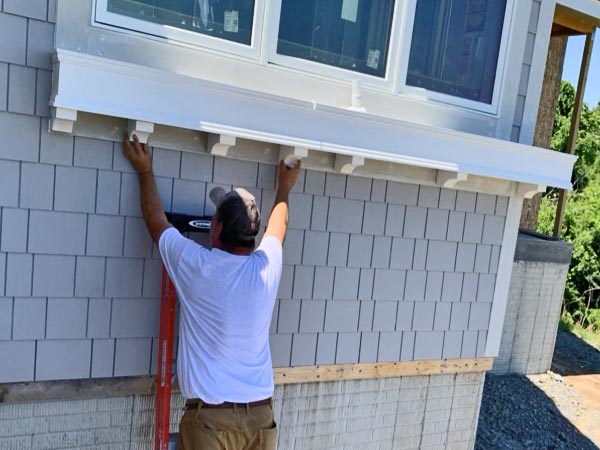
DIY - Installing Window Boxes
Once
you’ve built your window boxes, you need to install them properly. Here’s
how to go about it:
Materials
Tape measure
Pencil
Drill
Anchors
Level
Steps
Measure the
width of your window and the depth of the intended box to ensure it's the
correct size.
Consider
factors like sunlight and visibility to determine the best location for
the box on your window and ensure it isn’t blocking any views.
Using your pencil,
mark the spots where you’ll install the bracket.
Drill pilot
holes for the brackets, ensuring they’re slightly smaller than the anchors
used to secure the brackets.
Use masonry
anchors to secure the brackets to brick or stone walls and the level to ensure they’re
straight.
Place the window box on top of the brackets and adjust them to ensure the box
is stable or
directly bolt the box to your home by passing screws through the inside of the box and out the back through the siding and where the studs are located.
Check the
brackets or box and level regularly to ensure everything is secure and the box is
safe.
Tips for Securing Window Boxes in Place
Here
are a few tips for securing your DIY window boxes to ensure they’re stable:
1. Use Sturdy Brackets
Use
strong brackets that can support the weight of your window boxes and plants
inside. For this reason, buy brackets made of durable materials like metal or cedar with a high weight capacity. PVC window boxes can avoid using brackets altogether and can be bolted directly to a home through it's back. This is ideal when the studs are not symmetrically placed beneath a window which can cause symmetry problems when trying to use a structural bracket for support.
2. Consider Adjustable Brackets for a Railing
If you
need to change the angle of your window box due to the sun’s position or any
other factor,
a railing box with adjustable brackets may make more sense. You can tweak
these tools to your desired level.
3. Use the Right Hardware
You
need the right hardware for the type of wall and brackets available. If you’re
mounting a flower window box onto a brick wall, masonry anchors would be the
preferred choice to wood screws. Galvanized hardware and stainless steel screws are more desirable than zinc coated due to better water resistance over time.
4. Level Goes a Long Way
A
tilted box can become unstable over time and cause problems with the drainage resulting in flowers getting too much or too little water. Therefore, use a level during
installation to keep the box stable and straight—improving the uniformity of
your home’s exterior.
5. Use a Proper Drainage System
Ensure
the window box has holes at the bottom to allow excess water to drain out and
prevent waterlogging, which could kill your plants. If the holes are too small they can clog up over time and on the flip side if they are too big then soil can fall through the holes and get on the home causing staining. The ideal size drain holes are around 1/4" to 3/8" in diameter.
6.
Seal/Paint It for Protection Using a
sealant on wooden window boxes protects the material from moisture and stops it from
rotting.
7.
Check the Weight
If you
intend to use heavy plants in your window boxes, ensure the bracket and
hardware can support the extra weight. A window box measuring 36" wide and 8" tall and deep can easily weigh around 50 pounds by the time it is completely filled with soil and plants. Make sure you hit the studs with the hardware you are using to hold the box up.
To watch a video on how to install window boxes on siding and brick visit this link.
How to Waterproof and Seal Window Boxes
Waterproofing
your window boxes helps protect the wood from water damage or rot. Here’s a
step-by-step guide on how to properly waterproof and seal flower window boxes:
Materials
Sandpaper
(course & fine grit)
Clean, dry rug
Wood primer
Exterior
paint/stain
Waterproof
sealant
Paint
tray/container
Stir sticks
Step 1: Prepare the Surface
Remove any
spots or uneven surfaces on the lumbar using the course-grit
sandpaper.
Next, use the
fine-grit sandpaper to smooth out the wood surface and prepare it for the
primer.
Wipe the
surface with a clean, dry rug to remove dust or debris.
Step 2: Apply Primer
Apply a coat
of primer to the box using a paintbrush.
Let the primer
dry completely before applying paint.
Step 3: Paint or Stain the Box
Using a
paintbrush or roller, apply a coat of paint/stain to the window box.
Use light,
even strokes, to avoid over-applying the paint.
Let the paint
or stain dry completely according to the manufacturer’s
instructions.
Apply
additional coats until you achieve your desired finish.
Step 4: Apply Sealant
Once the paint
dries, apply a coat of waterproof sealant to the box using a paintbrush.
Let the
sealant dry completely according to the manufacturer’s instructions.
Apply additional
coats until you achieve the desired level of waterproofing.
Step 5: Finish
Once
the sealant dries, remove any tape used and install the box before filling it
with plants.
Note: Give
the paint and sealant more time to dry before watering your plants.
DIY - How to hang window boxes on a railing or balcony
You can
also install or
balcony to increase your
gardening space and personalize your apartment’s exterior.
However,
the installation process is different from that of window sills. Here’s how to
do it right:
Materials
Window box
Brackets/hooks
Pencil
Drill
Screws
Level
Tape measure
Step 1: Measure and Mark the Location
Measure the
width of the window box and the desired balcony or railing space for
hanging.
Use a level
and pencil to mark the location for installing the bracket or hooks.
Step 2: Install the Hardware
Use a drill to
attach the brackets to the railing/balcony using screws.
Ensure the
brackets are level and firmly attached to the railing or balcony.
Step 3: Hang the Window Box
Carefully
place the box on the brackets and ensure it’s level.
Adjust the
position of the brackets to ensure the box is in place.
Step 4: Finish
Fill the
window box with soil and your preferred plants.
To watch a video of
how to install flower boxes on a rail click here.
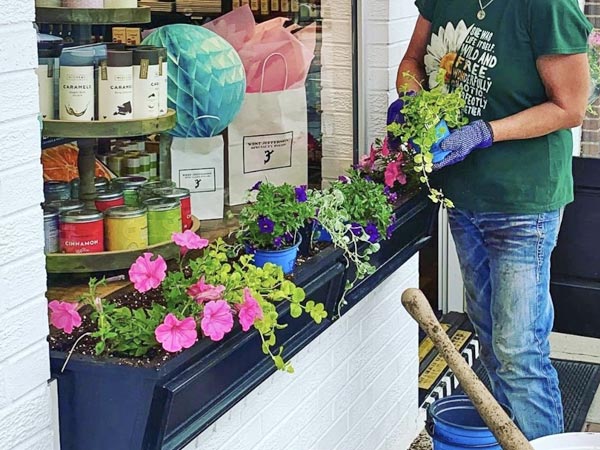
DIY - Planting Window Boxes
Planting window boxes requires you to consider how to line your box followed by plant and flower choice next, here we go:
Materials
* potting mix
* landscape fabric
* removable inserts, pots, or liners
For planting window boxes we usually recommend a good potting mix over cheaper soils as this will deliver better nutrients to your flowers over time which is sometimes a deficit with container gardening. Potting mix is also filled with less lose dirt which results in less spill through and getting on your siding during draining. Wooden window boxes will need to be sealed on the inside to avoid water absorption of the wood. If this can't be done consider getting a removable window box liner or insert instead. Small pots can also be effective but may result in the boxes looking less full or the plants being limited in how big they can grow over time. You can also cut up a trash bag and staple it to the inside of the planter to create a water barrier that separates the soil and the flower box. Make sure to drill good drain holes throughout however. Landscape fabric, or window box filter fabric, can be cut into strips and placed over the drainage holes to act as a last second catch all that filters large clumps of dirt that might be trying to spill through the bottom. You can also tape coffee filters over the drain holes to create a strong filtering screen that cleans the water out as it passes through the drain holes.
 About the Author About the Author
Matthew Buquoi is the owner of Flower Window Boxes, Inc., which is one of the largest online flower box companies in the United States. In addition to being the owner, he is also an expert author, and regularly writes about industry topics in the window boxes, planters, exterior shutters, and home and garden industry.
|
|
|